V-Gen
The V-Gen - Video Generation section is where users can create and manage AI-generated videos using avatars and text prompts. It provides a simple interface to generate, track, and manage video outputs.
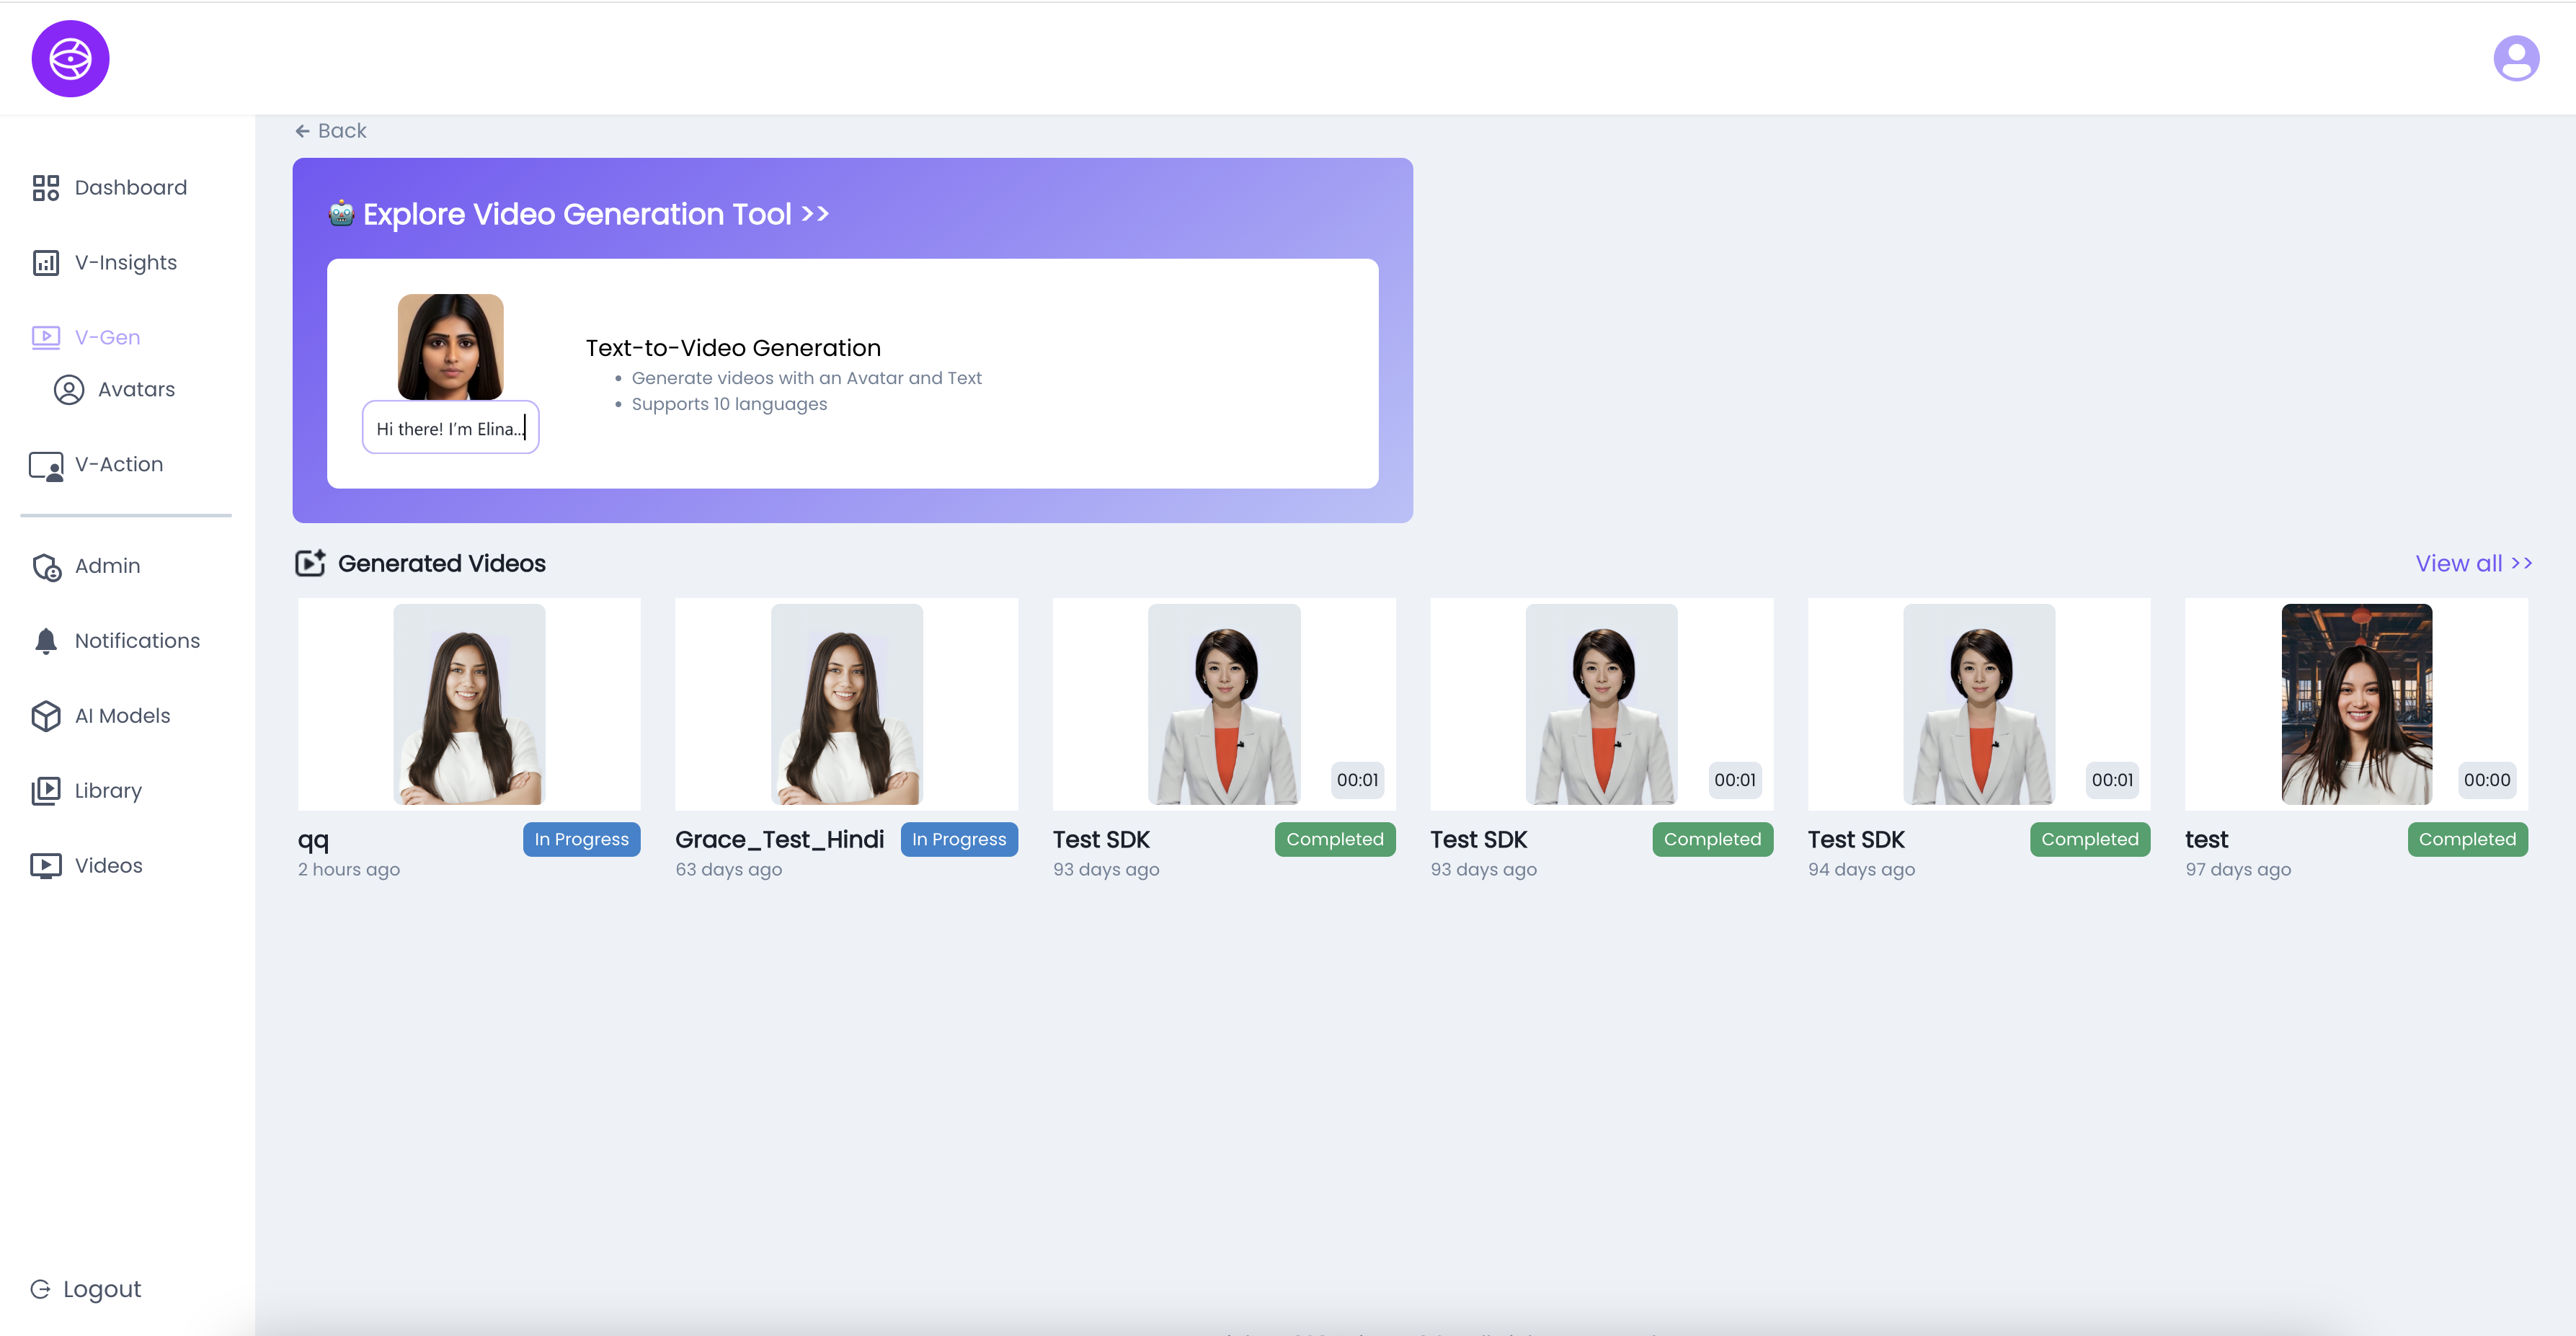
Key Features on the V-Gen Page:
- Explore Video Generation Tool
- Quick access to the Text-to-Video Generation tool.
- Allows users to:
- Generate videos with avatars.
- Provide input text that avatars speak.
- Create content in multiple languages (supports 10+ languages).
- Generated Videos Section
- Displays all videos that have been created or are in progress.
- Each video card shows:
- Thumbnail (avatar image).
- Video Title (e.g., qq, Grace_Test_Hindi, Test SDK).
- Status (In Progress / Completed).
- Time of creation (e.g., 2 hours ago, 93 days ago).
- Duration (length of video, shown in seconds).
- Video Status Indicators
- In Progress (Blue Tag) → Video is still being generated.
- Completed (Green Tag) → Video is ready for playback and use.
- View All Option
- Click “View All” to see the complete history of generated videos.
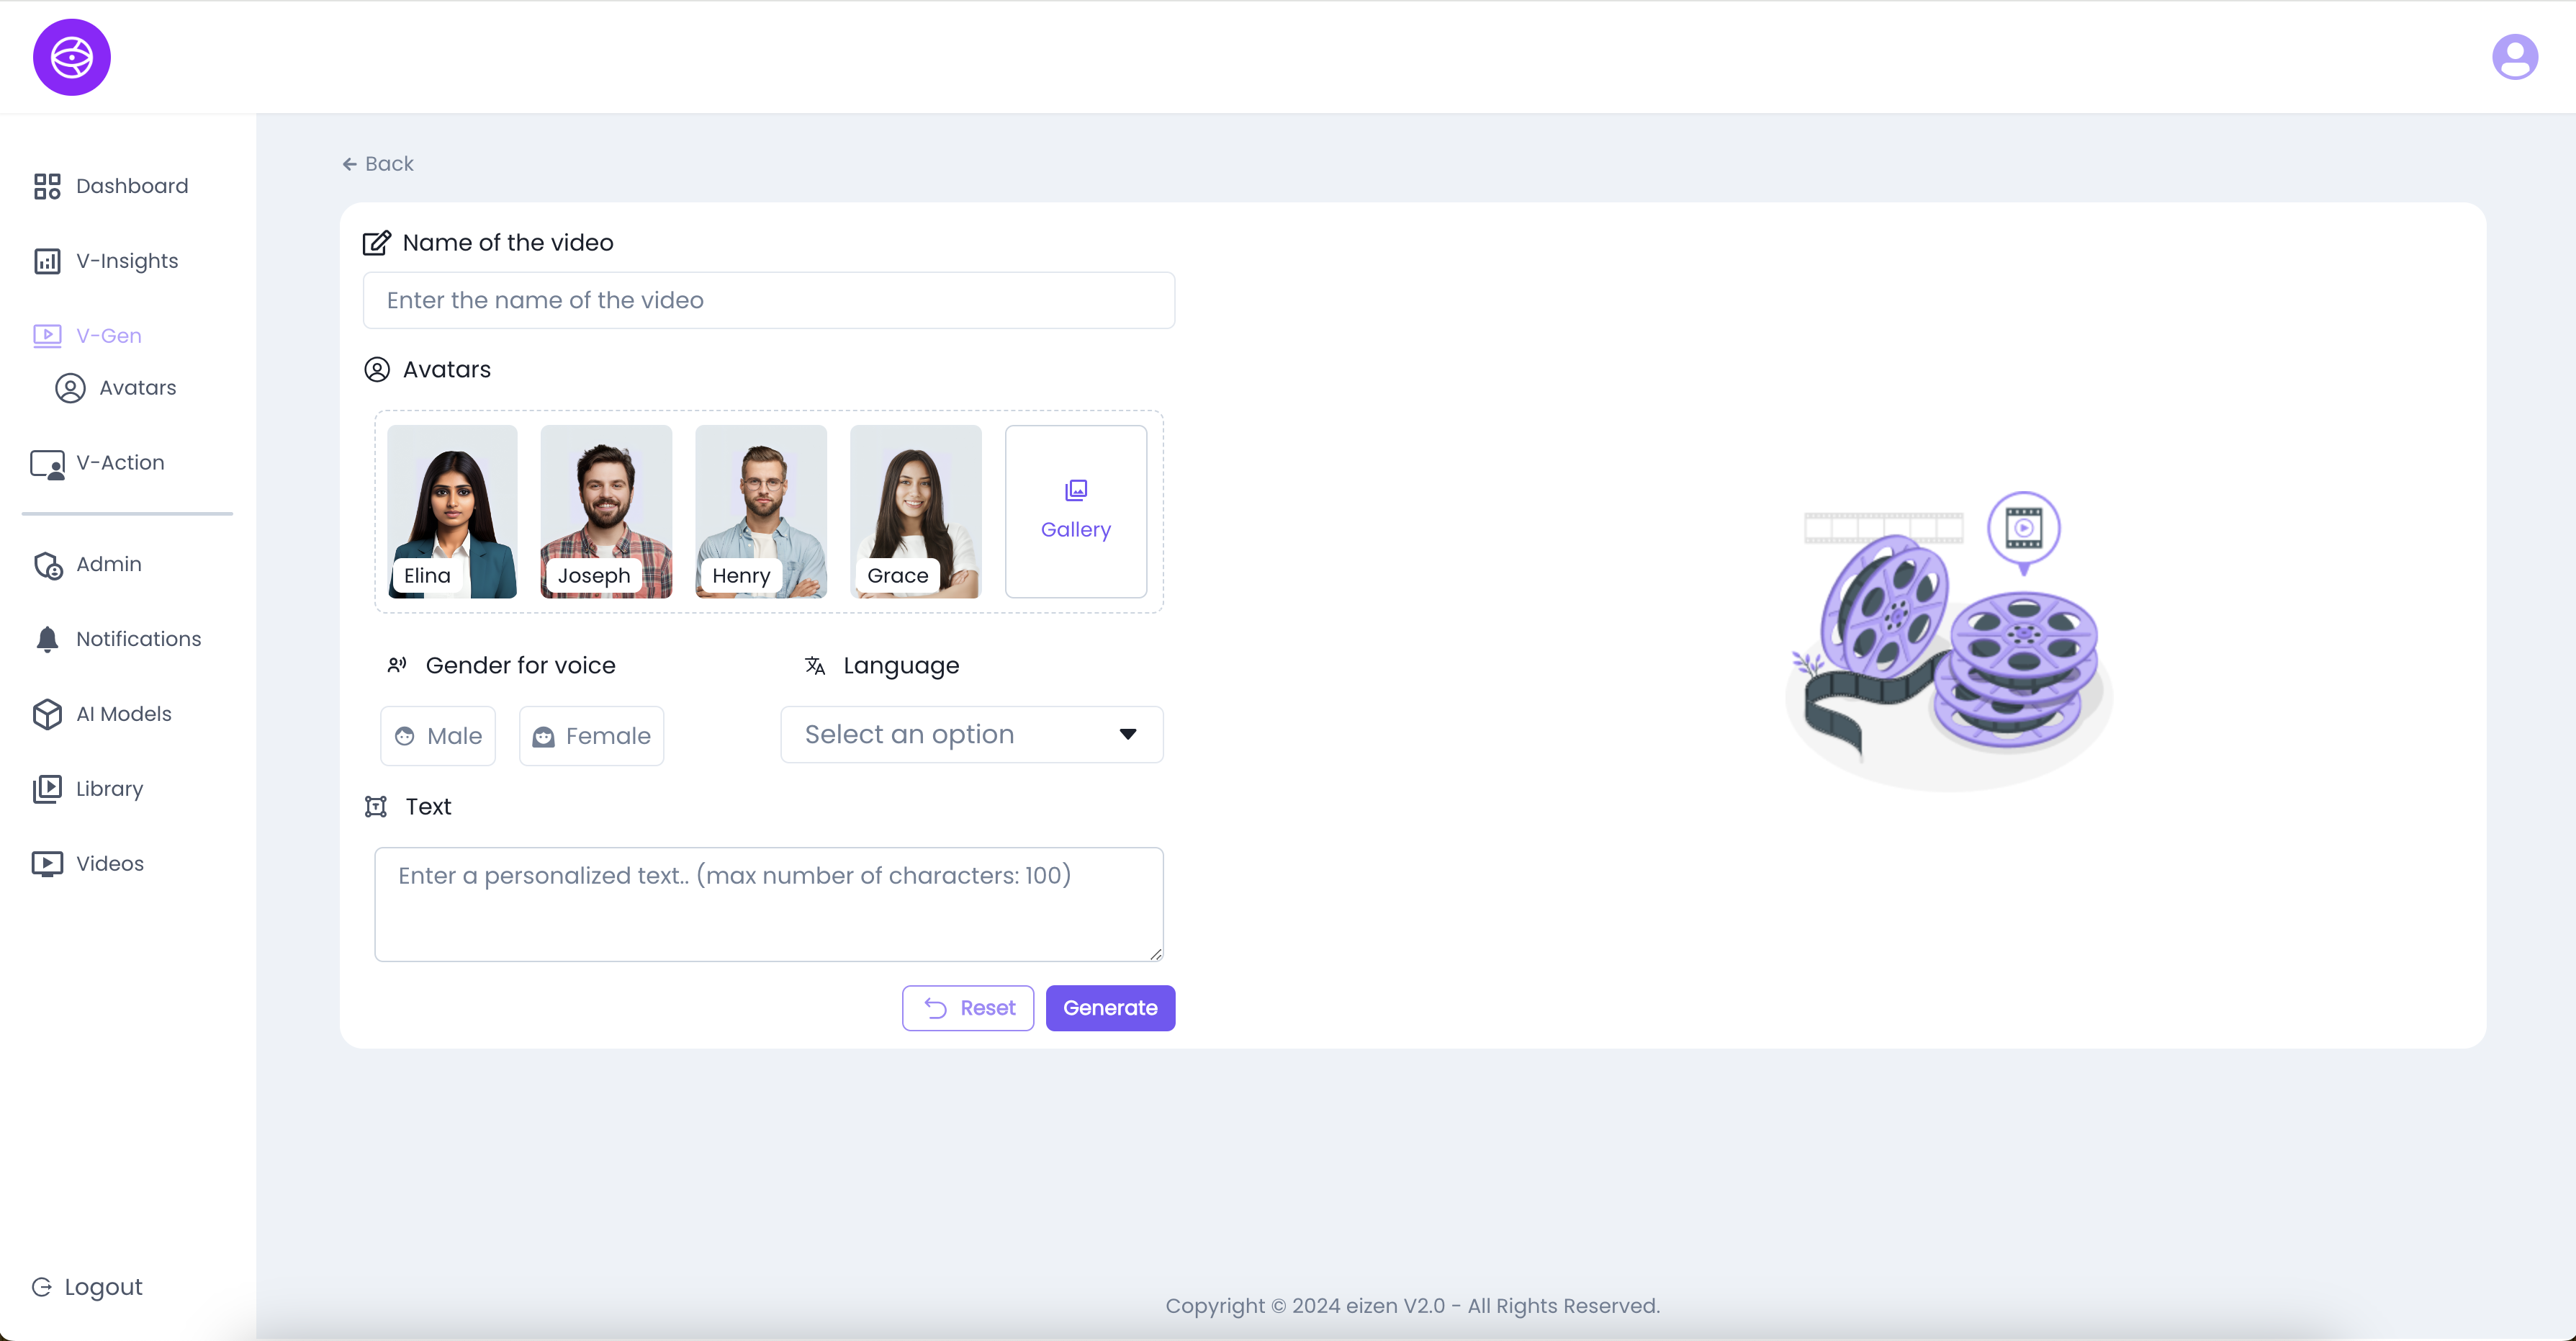
How to Generate a New Video in V-Gen
Follow these steps to create a new AI-generated video using the V-Gen (Video Generation) tool:
Step 1: Open V-Gen
- From the sidebar menu, click on V-Gen.
- The Video Generation page will open, showing the tool and previously generated videos.
Step 2: Launch Video Generation Tool
- Click on Explore Video Generation Tool.
- This will open the Text-to-Video Generation interface.
Step 3: Enter Text Script
- In the text field, type the script you want the avatar to speak.
- Example: “Welcome to our product demo. Today we’ll walk you through the key features.”
Step 4: Select Avatar
- Choose an AI avatar from the available options.
- The avatar will act as the speaker for the video.
Step 5: Choose Language
- Select a language from the supported list (10+ available).
- This ensures the avatar speaks the script in the chosen language.
Step 6: Configure Options (if available)
- Adjust any additional settings such as:
- Voice style (formal, conversational).
- Background (plain, custom).
- Video duration and pacing.
Step 7: Generate Video
- Click Generate to start processing.
- The video will appear under the Generated Videos section with status In Progress.
Step 8: Review Generated Video
- Once complete, the video status changes to Completed (green).
- You can now:
- Preview the video directly.
- Download or Save it for use.
- Reuse it in other platform workflows (like V-Action or Library).